
I recently participated with the CTF team Norse Code representing Hacking for Soju in the DEFCON 29 CTF qualifiers. There was a web challenge, so I went full speed ahead to solve it. Overall the challenge is fairly straightforward and not too difficult, but I decided to do a write-up on it to demonstrate one way that you are able to work through obfuscated JavaScript.
The challenge begins with a website link and a Chrome browser extension that you can download.
URL: http://threefactooorx.challenges.ooo:4017

Interacting with the website, we can see there is a file upload.

When sending an HTML file, we get the following back:

Based on the challenge description and file provided, we can gather that a Chrome browser with the extension installed is loading the HTML we send. This is what the request looks like:
POST /uploadfile/ HTTP/1.1
Host: threefactooorx.challenges.ooo:4017
User-Agent: Mozilla/5.0 (Windows NT 10.0; Win64; x64; rv:88.0) Gecko/20100101 Firefox/88.0
Accept: text/html,application/xhtml+xml,application/xml;q=0.9,image/webp,*/*;q=0.8
Accept-Language: en-US,en;q=0.5
Accept-Encoding: gzip, deflate
Content-Type: multipart/form-data; boundary=---------------------------75344376227301306764121513080
Content-Length: 229
Origin: http://threefactooorx.challenges.ooo:4017
Connection: close
Referer: http://threefactooorx.challenges.ooo:4017/submit
Upgrade-Insecure-Requests: 1

-----------------------------75344376227301306764121513080
Content-Disposition: form-data; name="file"; filename="test.html"
Content-Type: text/html

<u>test</u>
-----------------------------75344376227301306764121513080--
So at this point we know we have to dive into the browser extension. The extension looks like the following:
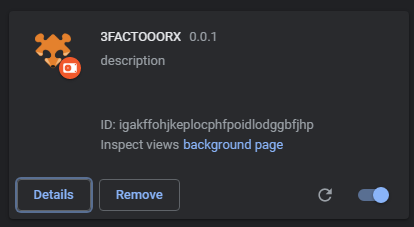
It is comprised of the following files:
- \3FACTOOORX-public\background_script.js
- \3FACTOOORX-public\content_script.js
- \3FACTOOORX-public\manifest.json
- \3FACTOOORX-public\icons\icon.png
- \3FACTOOORX-public\pageAction\index.html
- \3FACTOOORX-public\pageAction\script.js
- \3FACTOOORX-public\pageAction\style.css
When you first dive into a browser extension, the manifest is the first thing you want to look at.
1 2 3 4 5 6 7 8 9 10 11 12 13 14 15 16 17 18 19 20 21 22 23 24 25 26 27 28 29 30 31 32 | {
"manifest_version": 2,
"name": "3FACTOOORX",
"description": "description",
"version": "0.0.1",
"icons": {
"64": "icons/icon.png"
},
"background": {
"scripts": [
"background_script.js"
]
},
"content_scripts": [
{
"matches": [
"<all_urls>"
],
"run_at": "document_start",
"js": [
"content_script.js"
]
}
],
"page_action": {
"default_icon": {
"64": "icons/icon.png"
},
"default_popup": "pageAction/index.html",
"default_title": "3FACTOOORX"
}
} |
This provides you with the following information:
- The background_script.js file is always running in the background of the browser
- The content_script.js file loads immediately on all_urls which means any page load
Looking at the background_script.js file, we see the following:
1 2 3 4 5 6 7 8 9 10 | // Put all the javascript code here, that you want to execute in background. chrome.runtime.onMessage.addListener( function(request, sender, sendResponse) { console.log(sender.tab ? "from a content script:" + sender.tab.url : "from the extension"); if (request.getflag == "true") sendResponse({flag: "OOO{}"}); } ); |
This lets us know that if the chrome extension receives a sendmessage with getflag = true, we'll get the flag sent back in response. There is no way we are going to pull that off with JavaScript/XSS unless the chrome extension gives us a way to interact with it. If we could, it would look like this:
1 | chrome.runtime.sendMessage({getflag:true}); |
Moving past that, we have to look into the content_script.js file. Opening it up in notepad, we see a fairly typical obfuscated JavaScript file:

My initial attempts were to toss it at the following websites/tools:
- beautifier.io - This one just beautifies the JS to make it easier to read.
- JSNice.org - A tool that is really good at working through basic JavaScript obfuscation.
- de4js - A tool that can work through JS obfuscation techniques.
Unfortunately, none of this really helped.
Trying to manually go through the JavaScript, one of the first things we look at is the data array at the top OOO_0x5be3 because this is likely strings that referenced by most of the code.
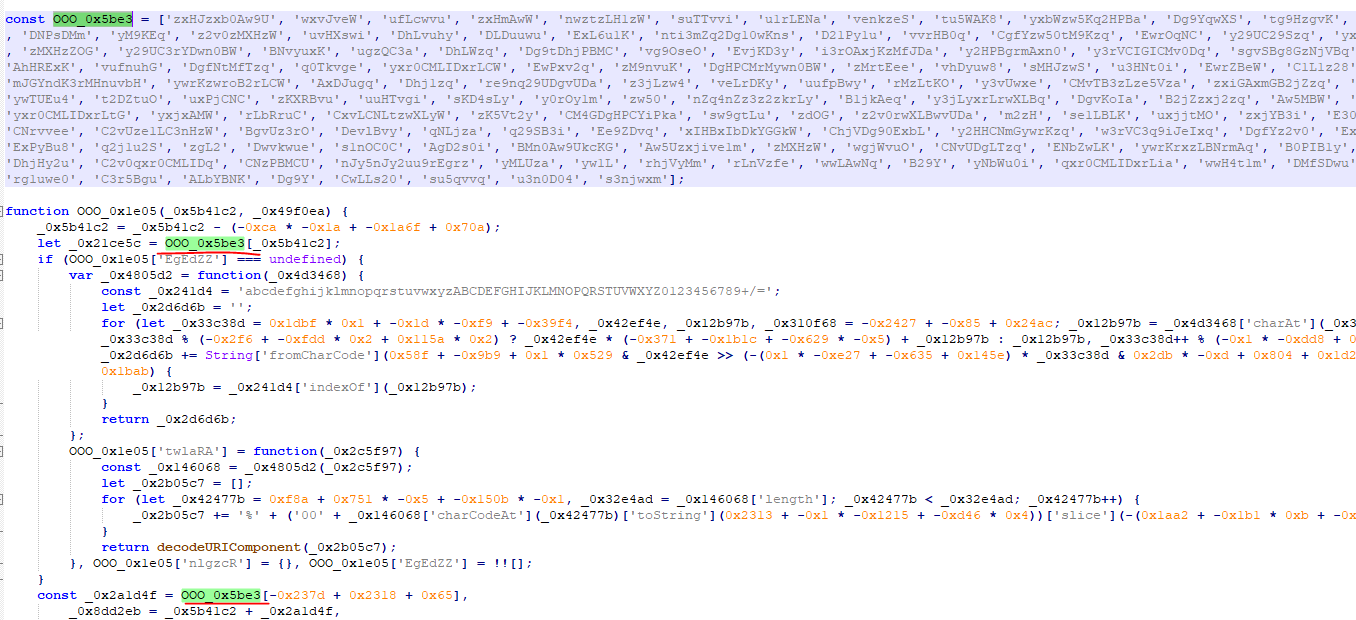
The OOO_0x1e05 function is used to deobfuscate the strings and we could use that to slowly string replace most of the script to make it more readable. However, there is a better approach than to do this manually - by using breakpoints in Chrome, we can call the obfuscated references directly in the console to see what the output is.
At this point I decided to install the extension on Chrome and work through the DOM manually with breakpoints. The first thing we do is open up an HTML page and look at the content script that gets injected. We do this by going to Sources -> Content scripts -> selecting the script -> beautifying it.

Now we can review the console for information and set breakpoints into the DOM to follow the code. Before diving into that, one of the first things we see is an error in the console:
![]()
Clicking the link on the right side, it will take us directly to the code that is throwing the error:
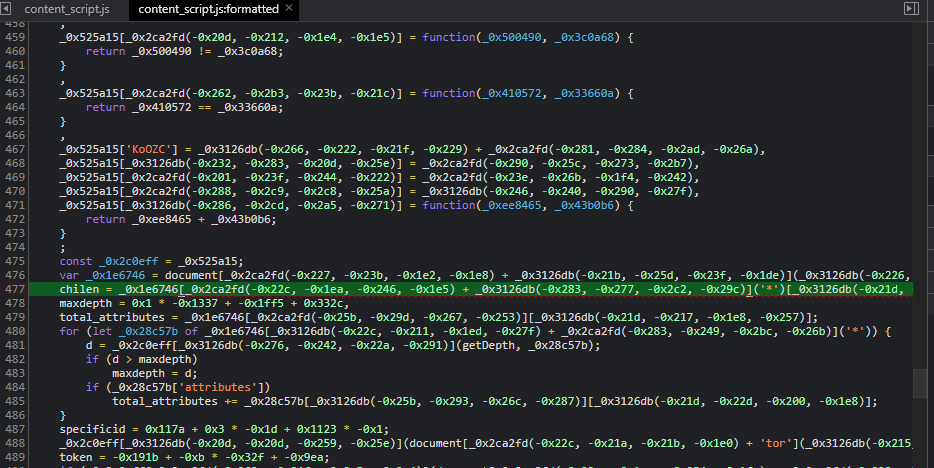
Code:
1 | chilen = _0x1e6746[_0x2ca2fd(-0x22c, -0x1ea, -0x246, -0x1e5) + _0x3126db(-0x283, -0x277, -0x2c2, -0x29c)]('*')[_0x3126db(-0x21d, -0x226, -0x229, -0x1e1)] |
This looks like nothing, right? So we click the number 477 on the left side of the code to set a breakpoint and refresh the page.

Instead of trying to work through the code and step through it, now we can do something really simple:
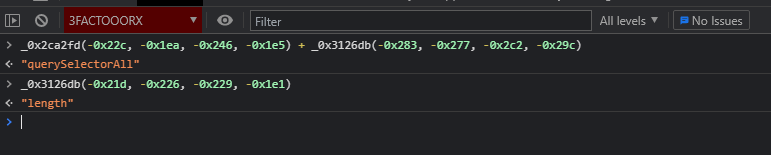
By throwing these strings into the console, we now know the line should read as:
1 | chilen = _0x1e6746["querySelectorAll"]('*')["length"] |
Now we repeat this process for the entire function to gather more information about what it is trying to select. Eventually we get to the following point:
1 2 3 4 5 6 7 8 9 10 11 12 13 14 15 16 17 18 19 20 21 22 23 24 25 26 27 28 29 30 31 32 33 34 35 36 37 38 39 40 41 42 43 44 | function check_dom() { _0x525a15['KoOZC'] = "#thirdfactooor"; _0x525a15["RkNoD"] = "INPUT"; _0x525a15["QwGfh"] = "QzIrw"; _0x525a15["IKmUR"] = "cunYq"; const _0x2c0eff = _0x525a15; var threeFAElement = document["getElementById"]("3fa"); chilen = threeFAElement["querySelectorAll"]('*')["length"]; maxdepth = 0; total_attributes = threeFAElement["attributes"]["length"]; for (let _0x28c57b of threeFAElement["querySelectorAll"]('*')) { d = _0x2c0eff["wmicU"](getDepth, _0x28c57b); if (d > maxdepth) { maxdepth = d }; if (_0x28c57b['attributes']) { total_attributes += _0x28c57b["attributes"]["length"]; } } specificid = 0; _0x2c0eff["ueJYA"](document['querySelector']("[tost=\"1\"]"), null) && (specificid = 1); token = 0; // if (_0x2c0eff["hJFjw"](document["querySelector"]("#thirdfactooor")["tagName"], "INPUT")) { if(document["querySelector"]("#thirdfactooor")["tagName"] == "INPUT") { if (_0x2c0eff["QwGfh"] !== _0x2c0eff["IKmUR"]) { token = "1337"; }else { function _0x2351ff() { return; } } } return totalchars = threeFAElement["innerHTML"]["length"], _0x2c0eff["TCJdK"](_0x2c0eff["TCJdK"](_0x2c0eff["TCJdK"](_0x2c0eff["TCJdK"](chilen, maxdepth) + total_attributes, totalchars), specificid), token); } |
There are specific lines we are looking at in here:
- It is looking for an element with the id of 3fa.
- It is selecting children elements and attributes inside of it.
- It is looking for an input element with the id of thirdfactooor.
- It wants an attribute of "tst=1" on one of the elements.
So we create an html file with the following:
<div id="3fa"> <INPUT id="thirdfactooor" type="text" value="test" tost="1" /> </div> |
Now when we refresh and load the HTML file again, we are no longer getting any errors. That means we can start to dig through the code and figure out what it wants from us now. We solved that it is loading the check_dom function to load these elements. We have a few options here, one is that we can work backwards to see what function is calling check_dom since we know there is a code flow there. Alternatively, we go through and see what is executing on page load.
If we scroll to the bottom of the JavaScript, we see the following:
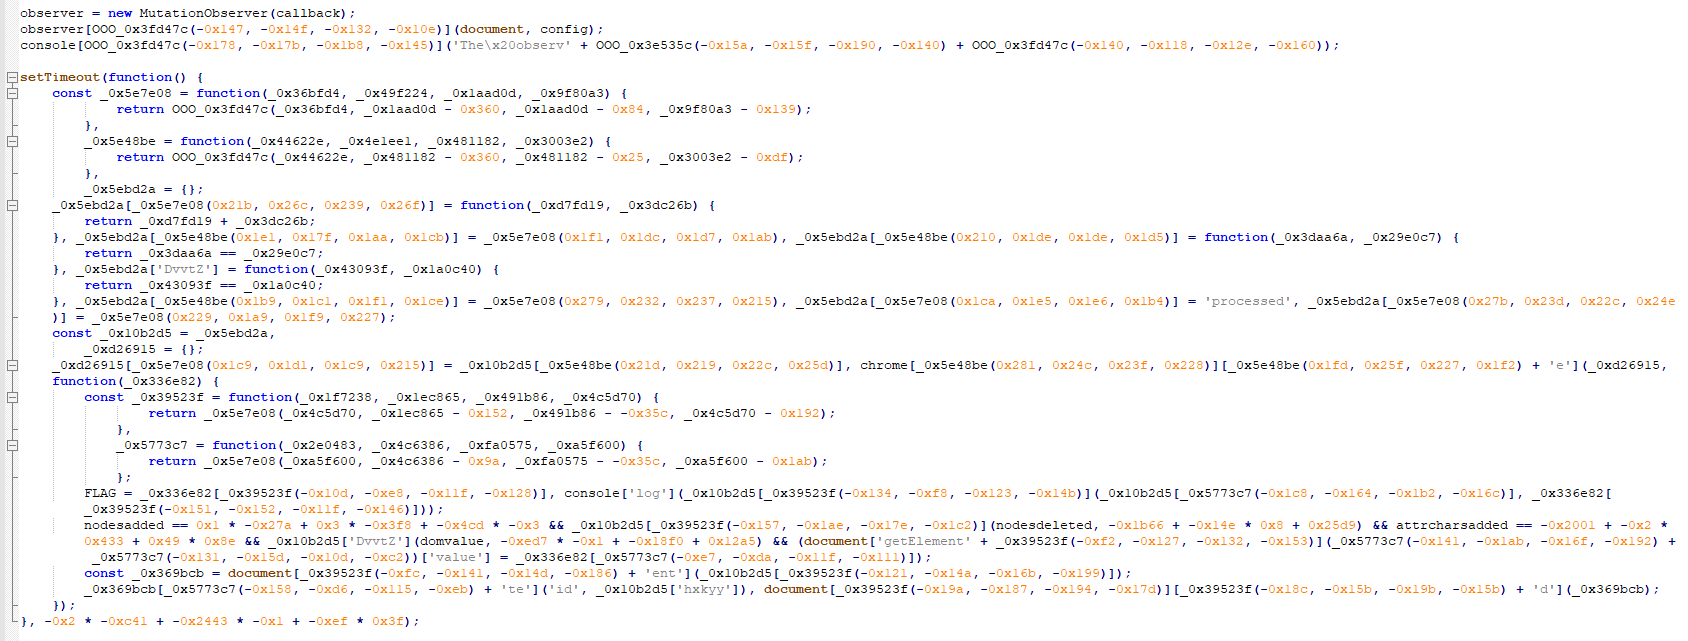
The immediate takeaways are:
- It is creating an observer that is monitoring for DOM changes which is calling the function callback.
- The script has a setTimeout (of 500ms) that executes on page load.
- A function inside of the setTimeout has some interesting variable names: FLAG, nodesadded, nodesdeleted, attrcharsadded.
Setting breakpoints and going through similar steps as before, we can deobfuscate the script a bit:
1 2 3 4 5 6 7 8 9 10 11 12 13 14 15 16 17 18 19 20 | setTimeout(function() { _0xd26915["getflag"] = _0x10b2d5["xOsuT"]; chrome["runtime"]["sendMessage"](_0xd26915, function(_0x336e82) { FLAG = _0x336e82["flag"]; // OOO{} console['log'](_0x10b2d5["KShsG"]("flag: ", "OOO{}")); if(nodesadded == 5 && nodesdeleted == 3 && attrcharsadded=23 && domvalue=2188) { document['getElementById']("thirdfactooor")['value'] = "OOO{}"; } const _0x369bcb = document['createElement']("div"); _0x369bcb['setAttribute']('id', 'processed'), document["body"]['appendChild'](_0x369bcb); }); }, 500); |
What we can derive from this almost immediately because the variable names were left intact, it is looking for the following variables before dumping the flag into the input we already created:
- nodesadded = 5
- nodesdeleted = 3
- attrcharsadded = 23
- domvalue = 2188
Knowing there is a DOM observer monitoring for these changes and we need it to execute at page load, we create some changes and set new breakpoints to see what happens:
<div id="3fa">
<INPUT id="thirdfactooor" type="text" value="test" tost="1"/>
<img src="." id="asdf1" />
<img src="." id="asdf2" />
<img src="." id="asdf3" />
</div>

<script>

document.getElementById("3fa").appendChild(document.createElement("LI"));
document.getElementById("3fa").appendChild(document.createElement("LI"));
</script> |
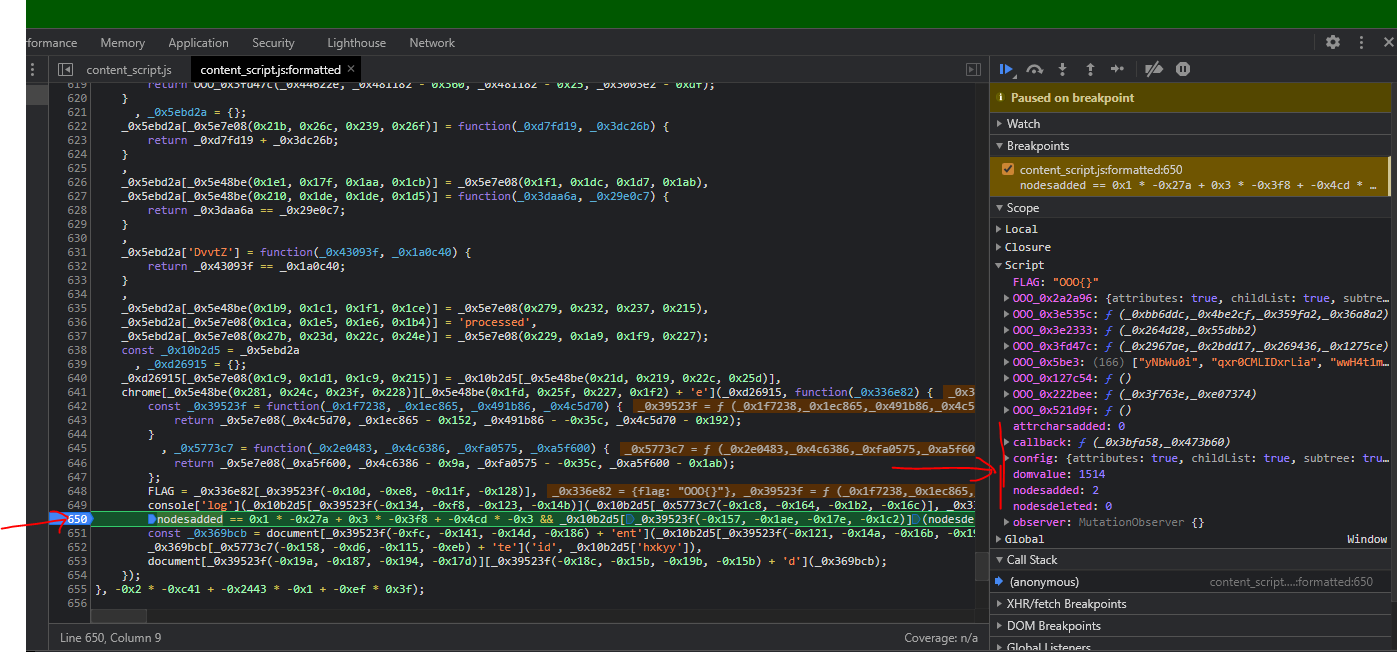
We can see with our changes, nodesadded is 2 and domvalue is 1514. So we further expand this to match the criteria required with the final HTML file:
<div id="3fa">
<INPUT id="thirdfactooor" type="text" value="test" tost="1" style="width:100%;" />
<img src="." id="asdf1" />
<img src="." id="asdf2" />
<img src="." id="asdf3" />
<img src="." id="asdf4" /><img src="." id="asdf4" /><img src="." id="asdf4" /><img src="." id="asdf4" /><img src="." id="asdf4" /><img src="." id="asdf4" /><img src="." id="asdf4" /><img src="." id="asdf4" /><img src="." id="asdf4" /><img src="." id="asdf4" /><img src="." id="asdf4" /><img src="." id="asdf4" /><img src="." id="asdf4" /><img src="." id="asdf4" /><img src="." id="asdf4" /><img src="." id="asdf4" /><img src="." id="asdf4" /><img src="." id="asdf4" /><img src="." id="asdf4" /><img src="." id="asdf4" /><img src="." id="asdf4aaaaaaaaaaaaaaaaaaaaaaaaaaaaaaaaaaaaaaaaaaaaaaaaaa" />
<img id="x" src="x" class="a" />
</div>
<script>
document.getElementById("3fa").appendChild(document.createElement("LI"));
document.getElementById("3fa").appendChild(document.createElement("LI"));
document.getElementById("3fa").appendChild(document.createElement("LI"));
document.getElementById("3fa").appendChild(document.createElement("LI"));
document.getElementById("3fa").appendChild(document.createElement("LI"));
document.getElementById('asdf1').remove();
document.getElementById('asdf2').remove();
document.getElementById('asdf3').remove();
document.getElementById("x").setAttribute("thisisalongstringderpde", "thisisalongstringderpde");
</script> |
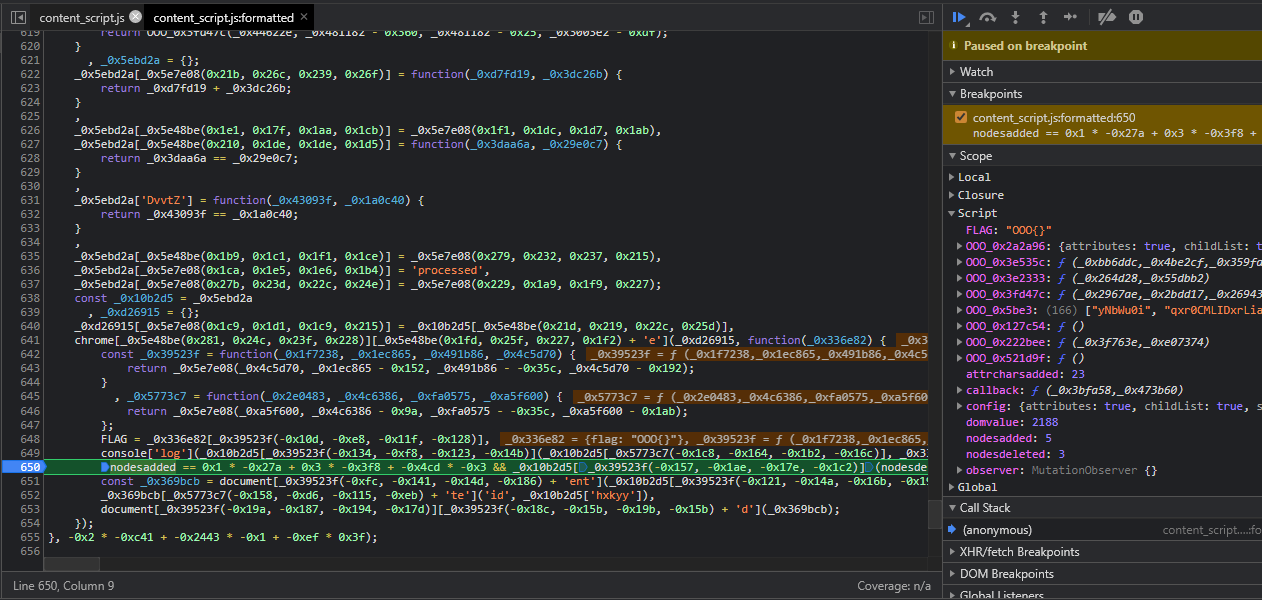
Now that it is getting the values that it wants, we submit it through the website to see what we get out.

Overall, this was a fairly easy challenge that would have been a bit more difficult if all of the variable names were obfuscated. Either way, I had fun working through the obfuscation to figure out what it was expecting.